
+1 Stone Skipping Progression Guide: First Throws to Zones, Wins, and Rebirth
The +1 Stone Skipping progression route end to end: bounces pay +1 Skill, level-ups raise your multiplier, farther zones pay more Wins, the first rebirth at level 20 — plus the observed gates for worlds, eggs, and zones.
Quick answer
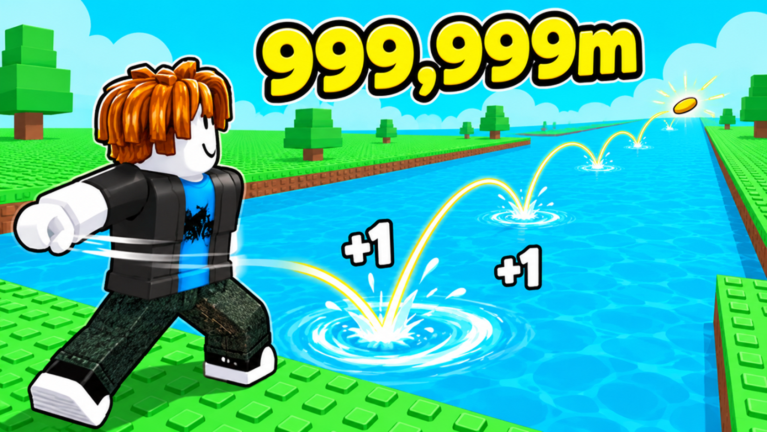
Throw, and every bounce pays +1 Skill. Skill fills your level bar, and each level raises your global Multiplier. Push to farther zones to earn more Wins — the trophy currency you spend on stones, pets, boosts, and progress toward the next rebirth. Then rebirth and repeat with more power behind your arm.
- Throw: your stone skips down the lane, every bounce pays +1 Skill, and longer throws reach more bounces.
- Level up: Skill fills the level bar and each level-up ticks your multiplier up (observed from x1.1 at level 6 up to x111 at level 115).
- Push zones: farther zones pay more Wins, so pushing your farthest zone is the main income upgrade in the game.
- Feed the loop: better stones and unusual objects to throw (even a DONUT), pets for powerful boosts, and rebirth to grow stronger and beat your longest throw.
Early-game priorities: the tutorial-to-first-rebirth route
Roadmap
- 1
Complete the tutorial
Collect about 30 Skill — the opening objective in a fresh-start session.
- 2
Make your first throws
Walk to the throw zone, throw, then throw again to bank your first Wins.
- 3
Buy the first stone upgrade
Spend those first Wins on the first stone upgrade, then head back to the throw zone.
- 4
Climb to level 20
Both observed fresh-start sessions connect the first Rebirth to reaching level 20.
- 5
Take the first Rebirth
Power and speed on the following throws visibly increase, and rebirth/claim rewards feed an immediate level jump — one session went from the tutorial straight into level 60 after claiming.
- 6
Keep the loop going
Throw, level, rebirth again — one fresh-start session was already on rebirth number seven shortly after its first.
Both step sequences are transcript observations from full fresh-account playthroughs, not documented tutorial text — follow them as the observed route and defer to in-game prompts if they differ.
Zones are the progression lanes and Wins are the income
Zones are the game's progression lanes: every throw travels down the water, and the farther it goes, the farther into the map you see. The zone chain's order was read directly from in-world signage in gameplay footage recorded September 26, 2026, across two separate sessions with the same order. Zones convert distance into income — the official description is direct: "Reach farther zones to earn more Wins" — and one observed 1,404 m throw paid +200 Wins. Wins, the golden-trophy currency, buy progress toward pets, boosts, and rebirths.
What the HUD tracks: the counter behind each system
Read these counters before deciding your next step — each one drives a different part of the route.
Comparison
| HUD element | What it is | Observed example |
|---|---|---|
| Skill (yellow bolt) | The currency you earn from bounces and levels. Drives your level bar. | "58 SKILL" early; millions later |
| Level bar (blue, stud texture) | Current level and progress to the next. Each level-up ticks your multiplier up. | "Level 6 — 8/10"; "Level Up! [x8]" |
| Multiplier | A global multiplier on your gains that climbs with level. | x1.1 at level 6 → x111 at level 115 |
| Wins (golden trophy) | The currency earned by throw distance — farther zones pay more. | +200 Wins for a 1,404 m throw |
| Round pink-blue icon | Your rebirth count. It gates the multiplier pads at spawn. | 0 at spawn → 5 after repeated rebirths |
| Friend Boost | A bonus when a friend is in the server. | +10% with a friend; +0% without |
Gate milestones: zone, world, and rebirth thresholds
The numbers below are the gates playthroughs actually hit on the way up. Several are transcribed from gameplay narration rather than documented in-game, so treat them as approximations to aim for — and read the in-game gate text before committing Wins.
Data table
| Next progression step | Gate as reported | How solid the number is |
|---|---|---|
| First Rebirth | Reach level 20 after the tutorial | Observed in two fresh-start sessions |
| Later Rebirths | Level requirements escalate: level 80, then targets including 125 ('So hard to make 125 levels'), 300, 425, and 500 ('Next rebirth are 500. We have made it to level 500') | Observed narration; exact per-rebirth formula not documented |
| Teleport to world 2 | A 100-million gate on throw/Skill ('we need to throw 100 meters or 100 I guess million... So, we need 100 million it looks like here'); a second session repeats a 100-million barrier before the next stage | Observed in two sessions; the units are noisy in the transcript |
| Teleport to world 3 | 250 billion Skill ('We need to throw with 250 billion skill right here') — the same session corrects an earlier '2.5 billion' misread | Treat as approximate; the stated value changed mid-recording |
| Zone unlocks | Frost Lake reportedly unlocks around ~35,000 Skill per a creator's video captions — an approximate, unverified number | Reported, unverified — exact thresholds for most zones are still unknown |
| Wins purchases along the route | Stones priced in Wins — observed mid-session prices of 15 million, 40 million, 110 million, and 300 million Wins for 'the best one here in this world'; eggs unlock around 5 million and 50 million Wins | Observed mid-session prices, not a complete price list |
| Egg/pet unlocks | Legendary and mythical eggs gated behind Win totals ('We need to get a few more wins here to get unlock legendary egg'; 'we need to get 50 million wins here, too. So, we can also open up that mythical egg') | Observed narration |
Where recordings disagree — the world-3 gate is the clear case, since the narration self-corrects mid-sentence — treat the corrected higher value as the working target and confirm against the in-game gate text before you spend.
When rebirth enters the loop — and when skipping it is faster
The Rebirth button in the side menu carries a percentage badge — observed at 70%, 86%, and 88% at different moments — that fills as you play. What exactly fills it is not readable in the footage, so treat the badge as a readiness meter and rely on your level bar, since narrated playthroughs consistently name concrete level requirements: 20 for the first rebirth, then 80, roughly 125, and up to about 500 between later ones. What the rebirth count does is clearer from the HUD: it gates the multiplier pads at spawn, observed going from 0 at spawn to 5 after repeated rebirths.
Timing shifts by stage. The first rebirth waits for the level-20 tutorial goal; mid-game, requirements like level 80 or 125 make each rebirth a level climb; late in sessions, players spam rebirths — "eight rebirths in 10 seconds" while chasing a 50-rebirth goal — or lean on auto rebirth ("So, auto rebirth is 120", a narrated mention whose unlock condition and cost are not specified). One observed efficiency call cuts the other way: the player stops rebirthing repeatedly — "we're wasting a lot of time by rebirthing and rebirthing like 10 more times" — and pushes to the next stage instead, because "over there, we're going to have times 400 for free or even more than 400." That trade-off is a single player's session reasoning, not a tested strategy. The same session's fast late-game loop: rebirth, switch stones, then throw at minimum distance — "It's just on minimum" — which the player describes as "10 times more faster" than chasing distance.
What speeds the route up
Tips
Skill Potions
A Skill Potion bumps the stat that grows every time your stone kisses the water, so later throws travel farther before they sink. One session also used a '2x skill potion... for 10 more minutes' before a final push.
Codes
Working codes drop Skill Potions, Win Potions, extra Wins, and a Common Egg — 'a big help when you're trying to get those longer throws.'
Playtime rewards
An observed session pulled a legendary egg from a playtime reward mid-run.
Pets and eggs
Wins sunk into egg unlocks buy 'even better pets,' whose boosts compound with later throws and rebirth progress.
Friend Boost
+10% with a friend in the server vs +0% without.
Related Guides
Leveling Guide
How bounces turn into Skill, how levels raise your multiplier, and which level milestones change your run.
Rebirth Guide
Know when the first rebirth unlocks, what resets, what you keep, and why each loop makes throws stronger.
Zone Order & Unlocks
Every zone in order with its Skill threshold, so you know when to push and what unlocks next.
Wins
Where Wins come from, which purchases are worth them first, and how far zones raise each payout.